 |
| My scary passport photo from ilaxstudio |
Ever felt like doing this to your brand new ID as soon as that nice crisp envelope you've been so anxiously awaiting arrives, then you gasp in horror when what's lurking inside sees the light of day.
There have been a couple times that I was honestly surprised the picture didn't burst into flame upon contact with real sunlight.
If you find yourself in a constant position of needing to verify that you are you, but the you on the ID card photo is not at all the you you want to show off, I have some great news for you.
I'm carrying out a promise I made in a previous post.
While renewing all of my licenses, passport, and other various documentation in prep for my move,
I attempted the impossible:
Taking a GOOD Driver's License and Passport Photo.
Guess what? Turns out it's not impossible!!
I just had to do a tiny bit of home work, and a smidgen of artistry on my end
and Blamo! I'm not going to be so shy when it comes to flashing this puppy around.
Here are the best finds I stumbled upon in my research portion of this application.
A big bear hug of a thank you goes out to these people:
Simple and straight-forward advice, I used a ton of tips from this article.
I found it unimportant to spend too much time worrying about what to wear,
since today's photos are far more close and personal than they've been in the past.
But, if you feel good, you look good, so from that perspective, dress it up to your heart's content.
Whitening your teeth prior: Hell yes!
I hadn't planned on flashing a toothy grin in the beginning, but since everything I read
recommended it, I bit the bullet, and despite my extremely angular features,
it definitely brightened up the pic in the end.
In such a small shot, it doesn't matter if you think a smile is flattering or not.
The proof is in the pudding, and if I can pull it off, so can you.
Tips 3-8 are just plain and simple essentials.
Wash and style hair to your liking.
Wear heavier make-up that accentuates your features (i.e. eyebrows, eyes, and lips for sure).
Earrings were a good idea, and I did it, but they kinda got lost in my hair.
People may gawk and stare as you primp yourself up in a public office, but you probably won't be seeing them again, so get over it. You're the one who reaps the benefits, after all.
Pressed powder is a major plus, especially if you're a bit oily. Just don't go overboard!
You don't want to see the powder in the photo; that's just embarrassing.
Turning your shoulders to a slight angle is very flattering.
However, #9 is a variable to me. I have a long face and wanted my eyes to pop,
so I went with a chin down, looking up approach.
I also have a very long neck, so I wanted to tone it down a few notches.
If you want to slim your face, push your chin forward and up slightly to give more definition.
It also gives the look of a longer neck.
Play around with your posturing in the mirror and try to commit it to muscle memory before your get the "deer in the headlights" experience.
#10: Smile, even if you doubt you should.
And even though #11 provides a great idea for how not to blink, you can always request a redo.
In fact, demand it if you have to!
I got a few helpful hints from this video as well.
This gal is so Hollywood it almost hurts (not an insult, it takes one to know one ;).
I love some of her suggestions, her enthusiasm, and the "ovarios" it takes to shoot a
video in the middle of any LA DMV. Bravo, Senorita!
One thing not stressed enough in the first article listed, but mentioned in this vid:
CONTOURING!
CONTOURING!
Pardon my inner Valley Girl for a moment, but OMG, contouring changes everything!
My face has some sharp and broad features, that if incorrectly lit, make me look
(well, I'll be nice) not so pretty. And they use such a harsh flash,
it makes you look two dimensional.
Unless... you contour those features to add shadow where in nature there should be some.
For instance, I have a prominent nose, high cheek bones and a strong jawline.
I don't have a problem with that until I get to the DMV.
But this time, I added light shadow to the sides of my nose,
DID NOT contour my cheekbones because they are already very well defined, but DID contour my jawline including my chin, fading it in from sides to center.
With all these things in mind, look at your own photo and figure out what requires the makeover:
What features do you want to stand out more?
What features do you want to stand out less?
It comes down to three musts in the end:
Outline, Highlight, and Shade.
Ok, and bust out the powderpuff.
I guess if would be kinda vague of me not to show you a before and after, eh?
Well, if you've read all this you've earned it... I won't hold out.
You may have to quickly avert your eyes so you don't have nightmares.
This is before:
I'm almost positive I pissed off the wrong DMV clerk and they secretly photoshopped this to be as bad as possible. That cannot be me...
Can you believe I thought I was smiling?!
My feelings about this photo when it was received in the mail, and everyday following basicly amounts to this:
 |
| Bunnies Do Scream by =MisterIngo |
This is my new one, and while I wouldn't say it's perfect, the improvement is undeniable:
Not bad, if I might say. Way better than the last. I actually look like a normal human in this one.
Hurrah!!
My feelings about this one are much more pleasant:
 |
| Naoto Hattori |
So just a couple more things from me and then give this a try yourself.
I'll break down the kit for you, and show you my top-drawer tools to make it happen:
1.) Eyes
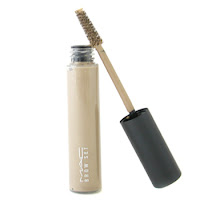
2.) Brows

-
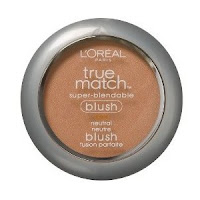
3.) Cheeks and Contour

4.) Lips
My pallet will not match yours exactly, so go with colors that flatter your skin type and tone.
Final notes:
1) You can't go wrong with the recommendations for the eyes.
2) Always go a shade or two lighter than your natural brow color.
3) Go for a bright but natural look for blush, and go just a few shades darker for your contouring color.
4) For almost everyone, a dark pink lip looks great on camera.
When I brought up this post to my boyfriend, smart-ass that he is and I love him for it,
he said,"Isn't vanity one of the seven deadly sins?" in jest of course.
But I still had a retort: "Yes, vanity is... but artistry is considered spiritual and even divine in most cultures, and I haven't seen any rules or regulations about what you decide your canvas is."
He liked it, and either way, I'm sticking to my guns on that opinion.
So in the name of ART: Go get yo-self a pretty picture.
Beauty is not a crime ;)


No comments:
Post a Comment